Saturday game idea project, 2 player physics and joints battle!
Published under company account here:
https://kelobyte.itch.io/probably-not-quite-accurate-judo-wrestling-simulator *free download
↧
Probably Not Quite Accurate Judo-Wrestling Simulator’2022
↧
Using OPEN AI GPT-3 API in Unity
- Download OpenAI dll (netstandard2.0): https://www.nuget.org/packages/OpenAI/
- Download required (netstandard2.0) dll files:
- Unzip and place dll files into Unity project, “Assets/Plugins/x64/” folder
- Signup for open ai API key: https://beta.openai.com/
- Use one of the methods for your api key: https://github.com/OkGoDoIt/OpenAI-API-dotnet#authentication
- My test script (note: reads api key from text file inside StreamingAssets/apikey.txt): https://gist.github.com/unitycoder/0bc4e0205bc24d17765e6df5c2a3fb64

↧
↧
Customize UnityHub colors
It seems to be common request to have light color theme as an option for the new unity 3.0 hub.. so, while unity is working on that(?), you can edit and customize the hub yourself!
Steps (New 06.03.2022, see comments for info that can edit index.html directly)
– Install 7zip : https://www.7-zip.org/download.html
– Install asar plugin for 7zip : https://www.tc4shell.com/en/7zip/asar/
– Install Notepad++ : https://notepad-plus-plus.org/downloads/
– Install JSTools for Notepad++ (to beautify js sources) : https://www.sunjw.us/jstool/npp/
– Open “app.asar” with 7zip from the hub folder, like “C:\Program Files\Unity Hub\resources”
– Unzip the asar somewhere
– Edit Builds/Renderer/index.html with notepad
– Paste new style tag inside <body></body>, after line “<script src=”index.js”></script> and just before </body>
– Take ready css style from andrews patcher: https://gitlab.com/GuitarBro/hub-patcher/-/blob/master/hub_patcher.py (*the style contents only, not full css string value with quotes, also here for easy copy: https://gist.github.com/unitycoder/13b5323728961dd812c648cb2cf21368 )
– Save index.html (this is your unpacked asar folder)
– Copy app.asar to other drive (as you cannot overwrite it inside program files from 7zip, unless its running as an admin)
– While 7zip has your copied asar package open, drag & drop the modified index.html into same folder inside the asar (build/renderer/index.html) to overwrite it
– Notice the app.asar date modified has changed (7zip has updated the package)
– Close hub completely
– Now copy app.asar over the original app.asar at hub installation directory *NOTE: take backup from original app.asar first!
– Run unity hub and enjoy your new colors!
Steps (Old steps, complicated way)
– Install 7zip : https://www.7-zip.org/download.html
– Install asar plugin for 7zip : https://www.tc4shell.com/en/7zip/asar/
– Install Notepad++ : https://notepad-plus-plus.org/downloads/
– Install JSTools for Notepad++ (to beautify js sources) : https://www.sunjw.us/jstool/npp/
– Open “app.asar” with 7zip from the hub folder, like “C:\Program Files\Unity Hub\resources”
– Unzip the asar somewhere
– Edit Builds/Renderer/index.js with notepad, and use Plugins/JSTool/JSFormat to beautify source *(search for #1a1a1a to modify the main color and look for those CSS strings & colors inside the code, look for the html, body in that string.
– Save index.js (this is your unpacked asar folder)
– Copy app.asar to other drive (you cannot overwrite it inside program files from 7zip, unless its running as an admin)
– While 7zip has your copied asar package open, drag & drop the modified index.js into same folder inside the asar (build/renderer/index.js) to overwrite it
– Notice the app.asar date modified has changed (7zip has updated the package)
– Close hub completely
– Now copy app.asar over the original app.asar at hub installation directory *NOTE: take backup from original app.asar first!
– Run unity hub and enjoy your new colors!
Ideas:
– modify the source so that it loads external CSS theme! Then you can easily edit those CSS styles outside hub and without unpacking asar..


↧
LudumDare#50: Delay the inevitable
Small game (in the jam-category as the sound fx’s are taken from freesound)
https://ldjam.com/events/ludum-dare/50/wobbly-plankster
Includes global hiscore list!
Recorded few clips while working on it,
https://www.youtube.com/watch?v=b-oNFXkMX04 (part 1/5)

↧
(Sources) Fog Of War – effect

Finally uploaded this old fog of war test project from https://unitycoder.com/blog/2014/10/16/2d-fog-of-war-unity/
Its raycast + vertex color based effect. (not really optimized, as it linecasts each vertex right now..)
Sources:
https://github.com/unitycoder/FogOfWar
Cleaning up the project and upgrading from 4.x:
↧
↧
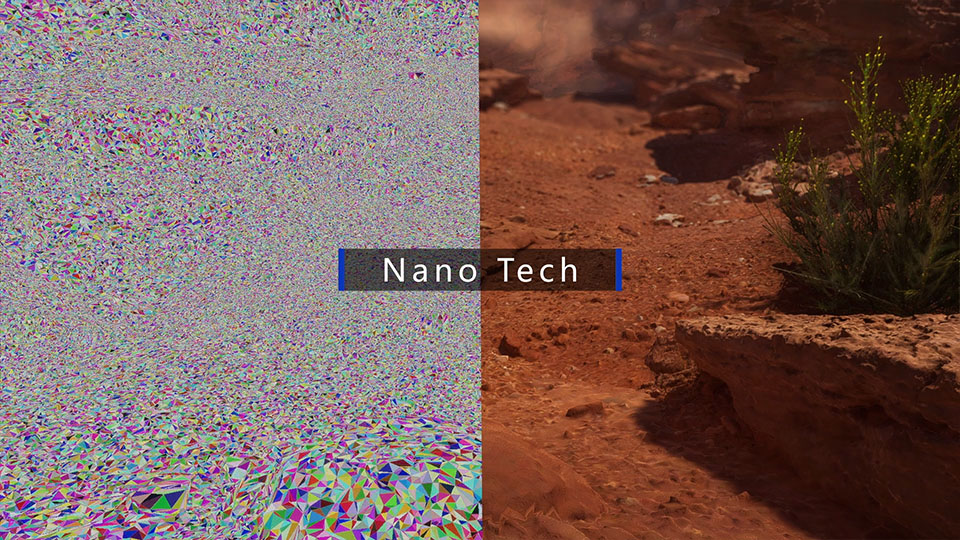
(news) Nano Tech for Unity
Most exiting plugin for unity, they have crowdfunding running (i’ve already backed, so should you!)
“A fast rendering system for highly detailed meshes, made for Unity. Supports HDRP / URP / Built-in”
https://www.indiegogo.com/projects/the-unity-improver-nano-tech/x/1801544
↧
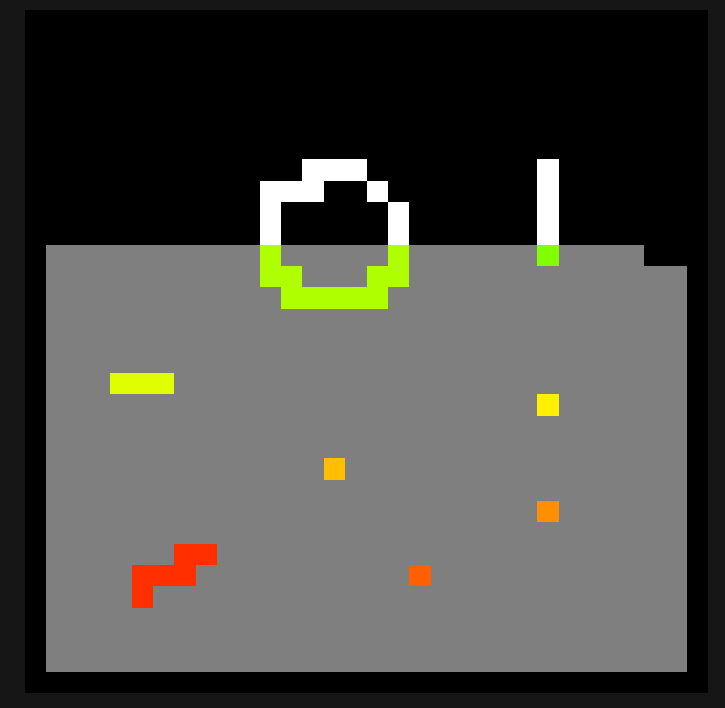
Testing Connected Component Labeling
Tried to do https://en.wikipedia.org/wiki/Connected-component_labeling
but it didn’t work as i didnt add floodfill or recursive neighbor checking..
Video:
https://www.youtube.com/watch?v=JNJhdNYm8pc
Script from the video:
https://gist.github.com/unitycoder/518188714ab8a29a0c6ca312e71fc0a3
↧
Unity Stable Diffusion plugin
..for fetching images from InvokeAI web service (locally), inside unity (editorwindow).
You can generate images, seamless textures or use initial image to “improve” your programmer art!
Note currently only support version InvokeAI 1.14.1
Project:
https://github.com/unitycoder/UnityInvokeAI

Making of videos:
Full struggle recorded in videos, https://www.youtube.com/watch?v=MKME8r9T-Ns&list=PLi5GhVWoWyw6O4OShX9MqFaYIIVtBYLUB
↧
Draw Pseudo Hilbert Curve
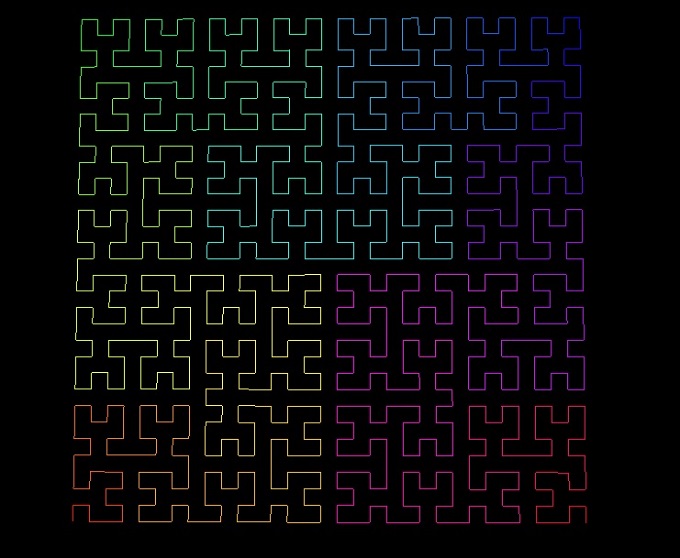
Followed this tutorial: The Coding Train
https://www.youtube.com/watch?v=dSK-MW-zuAc
my source code:
https://gist.github.com/unitycoder/f4ea8071a5d6ccceef210550bc5f0cf3
↧
↧
Painting with Compute Shader
Finally tested compute shaders for drawing into render texture:
↧
[LudumDare52] Theme: Harvest
Small bot programming game, sadly has only 2 commands to use in this initial version..
ldjam entry:
https://ldjam.com/events/ludum-dare/52/harvest-bot

Making Of video:
https://www.youtube.com/watch?v=1B7P3mS4_i4
Ideas for future (if want to extend this later..)
– More features (sensor to direction, shoot, enemies, destroyable objects )
– Play against other bots in same scene (import other bot brains online)
– Different scenes
– View brain toggle during play (can see what step is executing)
– ..
Previous jam entry:
– https://ldjam.com/events/ludum-dare/50/wobbly-plankster
↧
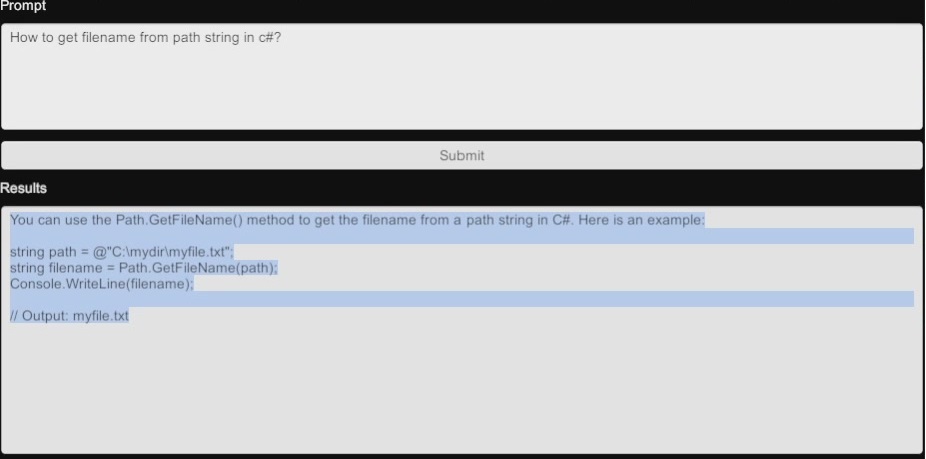
Using OpenAI API with WebRequest from Unity
Simple example for calling openAI completions API, with simple webrequest (and JSON data).
Repository:
https://github.com/unitycoder/UnityOpenAIGPT3
Making of video:
↧
Fake 3D Parallax Effect using Shader & (Pre-generated) Depth Map

Cool effect: http://depthy.stamina.pl/#/sample/mango
Converted this few lines into unity shader:
https://gist.github.com/bozzin/5895d97130e148e66b88ff4c92535b59
Finished shader (unlit, build in pipeline) + mouse position script:
https://gist.github.com/unitycoder/696a07c9de34e6a8fd28dc7de2362501
↧
↧
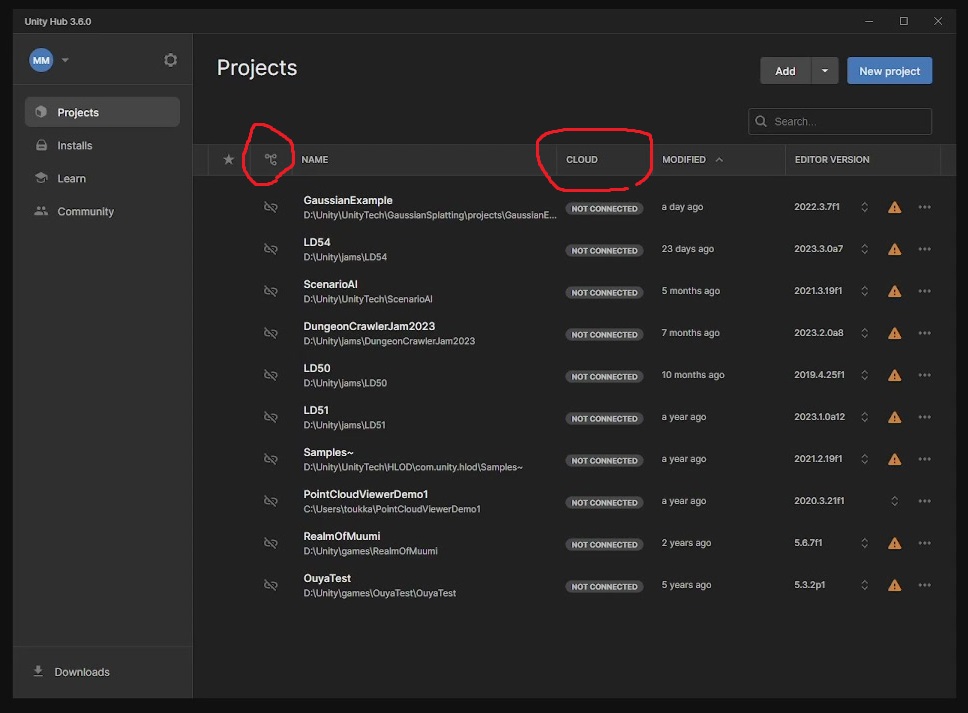
UnityHub 3.6.0: Remove Version Control & Cloud Dashboard columns
Before:
——————————–
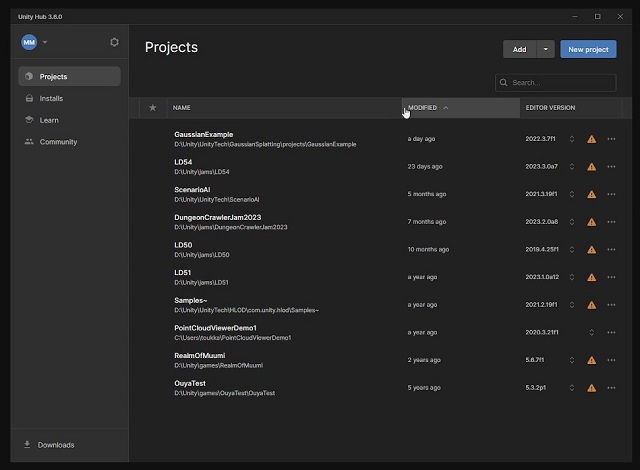
After:
Steps:
- Install 7zip https://www.7-zip.org/download.html
- Install ASAR plugin for 7zip https://www.tc4shell.com/en/7zip/asar/
- Close Hub completely (from notification bar also)
- Run 7zip manager as Administrator
- Browse into C:\Program Files\Unity Hub\resources\ folder
- 7zip: Open app.asar file
- 7zip: Browse into build/renderer/ folder
- 7zip: Right click on “index.html” and select Edit
- Notepad opens, press ctrl+F to search: </head>
- Notepad: Press enter before the </head> tag (to add new lines there)
- Notepad: Paste following CSS style inside head tag: https://gist.github.com/unitycoder/dc012222230c26dec631b4004063fc7f
- Notepad: Press Save (ctrl+s)
- Close notepad – ‘File index.html weas modified, do you want to update… Click OK to save
- After save has finished, run Unity Hub normally (columns should be hidden now)
If you broke something, install hub again. (or better if you had taken backup copy of app.asar before modifying it)
You could modify other parts too, like remove excess padding from those rows..
video
Older post about customizing colors
https://unitycoder.com/blog/2022/03/02/customize-unityhub-colors/
You can also write python script to automatically modify template
https://gitlab.com/GuitarBro/hub-patcher
Updated hub patcher here: (to do the above modification automatically using python+npx)
https://github.com/unitycoder/UnityHubPatcher
Installing older hub version:
https://forum.unity.com/threads/a-new-hub-release-is-available-v3-6-0.1509407/page-2#post-9435404
↧
Install Android SDK+JDK+NDK for Unity (without AndroidStudio or Unity Hub)
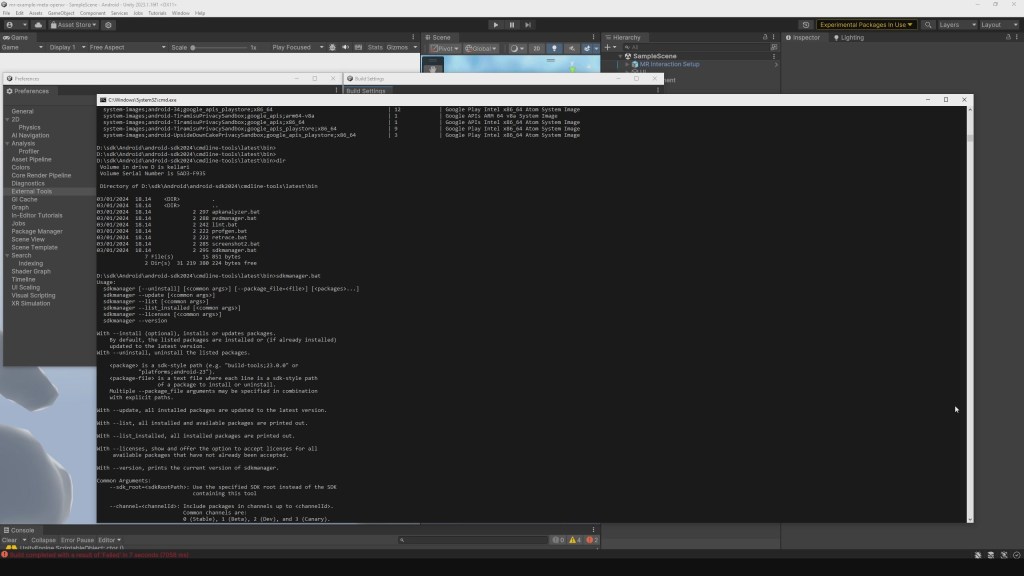
I just wanted to build Quest 3 XR demo apk quickly.. but ended up fighting with android sdk installations.
STEPS
- You need to have android sdk already (the older version, you can try this: https://dl-ssl.google.com/android/repository/tools_r25.2.5-windows.zip *i’m using this https://www.dropbox.com/s/aqze528vj59ka7i/android-sdk-with-sdk-manager.7z?dl=1 )
- optionally: check if this works or helps, https://stackoverflow.com/questions/43685301/how-to-install-the-gui-android-sdk-manager-without-installing-android-studio/51429889#51429889
- download jdk-11.0.14 from https://www.oracle.com/java/technologies/javase/jdk11-archive-downloads.html
- get temp oracle login from https://bugmenot.com/view/oracle.com
- I picked “Windows x64 Installer” and installed to default location
- maybe not needed: install JRE update from https://www.java.com/en/download/ (had “1.8.0_202” earlier, now its “1.8.0_391”), installed into default location
- download android-ndk-r23b from https://dl.google.com/android/repository/android-ndk-r23b-windows.zip
- unzipped it to some location
- download commandline tools for windows: https://dl.google.com/android/repository/commandlinetools-win-10406996_latest.zip *although i later downloaded older version from https://web.archive.org/web/20230613204636if_/https://dl.google.com/android/repository/commandlinetools-win-9477386_latest.zip (but probably the latest version would had worked also)
- unzip into your old android SDK folder, i had old SDK in D:\sdk\Android\android-sdk\, so i unzipped latest command line tools into: D:\sdk\Android\android-sdk\cmdline-tools\
- create folder structure, so that your files are inside “latest” folder, in: D:\sdk\Android\android-sdk\cmdline-tools\latest (so latest folder has the bin/, lib/, notice.txt, source.properties)
- confirm that %JAVA_HOME% points into new JDK11, test with cmd prompt: echo %JAVA_HOME% (i had it pointing into old folder, C:\Program Files\Java\jdk1.8.0_202, edited Windows Environmental variables to use new folder: C:\Program Files\Java\jdk-11.0.14)
- install build tools:
- Test if unity accepts your folders in preferences now: JDK = D:\sdk\Android\jdk-11.0.14 , SDK = D:\sdk\Android\android-sdk , NDK = D:\sdk\Android\android-ndk-r23b
- Test building, for me it asked to upgrade some platform tools, clicked ok.
TROUBLESHOOTING
sdkmanager.bat says: “.. been compiled by a more recent version of the Java Runtime (class file version 55.0), this version of the Java Runtime only recognizes class file versions up to 52.0”
your java home is probably pointing into old folder, update windows env. variable for %JAVA_HOME% (and restart commandprompt to take effect)
info about versions:
49 = Java 5
50 = Java 6
51 = Java 7
52 = Java 8
53 = Java 9
54 = Java 10
55 = Java 11
56 = Java 12
57 = Java 13
58 = Java 14
59 = Java 15
60 = Java 16
61 = Java 17
62 = Java 18
63 = Java 19
64 = Java 20
65 = Java 21
https://stackoverflow.com/a/47457251/5452781
Video:
↧
Using 3D gameobject prefabs with Unity Tilemap + NavMesh Surface
Required Packages
– Tested this on Unity 2023.2.3f1 (but works in other versions too)
– AI Navigation : https://docs.unity3d.com/Packages/com.unity.ai.navigation@2.0/manual/index.html
– 2D Tilemap Editor : https://docs.unity3d.com/Packages/com.unity.2d.tilemap@1.0/manual/index.html
– 2D Tilemap Extras : https://docs.unity3d.com/Packages/com.unity.2d.tilemap.extras@4.0/manual/index.html
Setup Tilemap with 3D Prefabs
– Add 2D Tilemap to Scene
– Set Grid Cell layout to XZY (so that its flat on ground)

– Create 3D Box in scene view, name it TileGrass, give it green color material, Make prefab from it (drag to Project window, some folder)
– Create 3D Box in scene view, name it TilePath, give it brown color material, Make prefab from it (drag to Project window, some folder)
– Project window: Create 2D/Tile palette/Rectangular
– Drag & Drop TileGrass and TilePath prefabs from Project window into Tile palette grid
– Select TileGrass in Tile Palette
– At Tile Palette window bottom left, select “GameObject Brush” from the dropdown (and click Toggle Brush Inspector button (top right bottom in Tile Palette window) *If they are not visible, resize tilepalette
– Assign Element 0: TileGrass prefab from Project window (do the same for TilePath)
– Now with TileGrass selected in Tile Palette window, you can paint into Scene Tilemap (select it first)
– Then toggle Paint mode in Tile Palette window top toolbar (the pencil brush button)
– You can erase painted tiles with left shift+left mouse button (or press I while mouse over some painted tile to Pick that tile as brush)

Adding NavMesh Pathfinding
– Select TileGrass prefab from Project window, add NavMesh Obstacle component to it

– Create new empty Gameobject in Scene, add NavMeshSurface component to it

– Test Baking, if road does not get over-layed with navmesh then open Window/AI/Navigation
– Make Agent radius 0.2 (so that it fits the road)

– Press Bake again in NavMeshSurface gameobject, blue area should appear over Path

Setup AI Agent
– Create new capsule gameobject in Scene (name it “Agent”)
– Place it at your tilemap path start position, can make it 0.5x smaller to fit better
– Add NavMeshAgent component to this gameobject
– Add this SampleAgent script to it https://gist.github.com/unitycoder/8e6e27faca3d40abf50c0842a51af558
– Create new empty gameobject in scene (name it “GoalGo”)
– Move it at the end of your Path
– Assign “GoalGo” gameobject into SampleAgent script in the gameobject
– Press Play
– Agent should move towards goal position, following the available path


References:
– NavMeshSurface: https://docs.unity3d.com/Packages/com.unity.ai.navigation@2.0/manual/NavMeshSurface.html
– Better 2D Navmesh (works with 2D objects instead of 3D objects) https://github.com/h8man/NavMeshPlus
Video:
↧
Use TikTok-TTS in Unity (with WebRequest)

Was watching some weird physics based game developed at https://www.twitch.tv/clayman_dev and they used node.js+tiktok TTS to play funny text-to-speech sounds!
Then found this library, https://github.com/Steve0929/tiktok-tts
(took a while to get it working as node.js, due to sessionid+server mismatch, but posted solution here https://github.com/Steve0929/tiktok-tts/issues/17 )
Then “converted” it to Unity.. (*not much to convert, it is just a Webrequest (POST) and few header values.. problem is that if you post wrong data, it just says “404”, so you don’t know whats the issue..
Initially tried to get this working https://docs.unity3d.com/ScriptReference/Networking.UnityWebRequestMultimedia.GetAudioClip.html but then checked original node.js sources, where it uses POST request, instead of GET.. so that was the main issue! (and setting cookie to getrequest was probably initially wrong,
Check repo source & instructions for getting tiktok sessionid+server:
https://github.com/unitycoder/tiktok-tts-unity
Sample audio:
https://soundcloud.com/user-689598301/tiktok-tts-sample
making of / struggling video:
*This is not their official API, so it could be closed anytime or the servers might change..
↧
↧
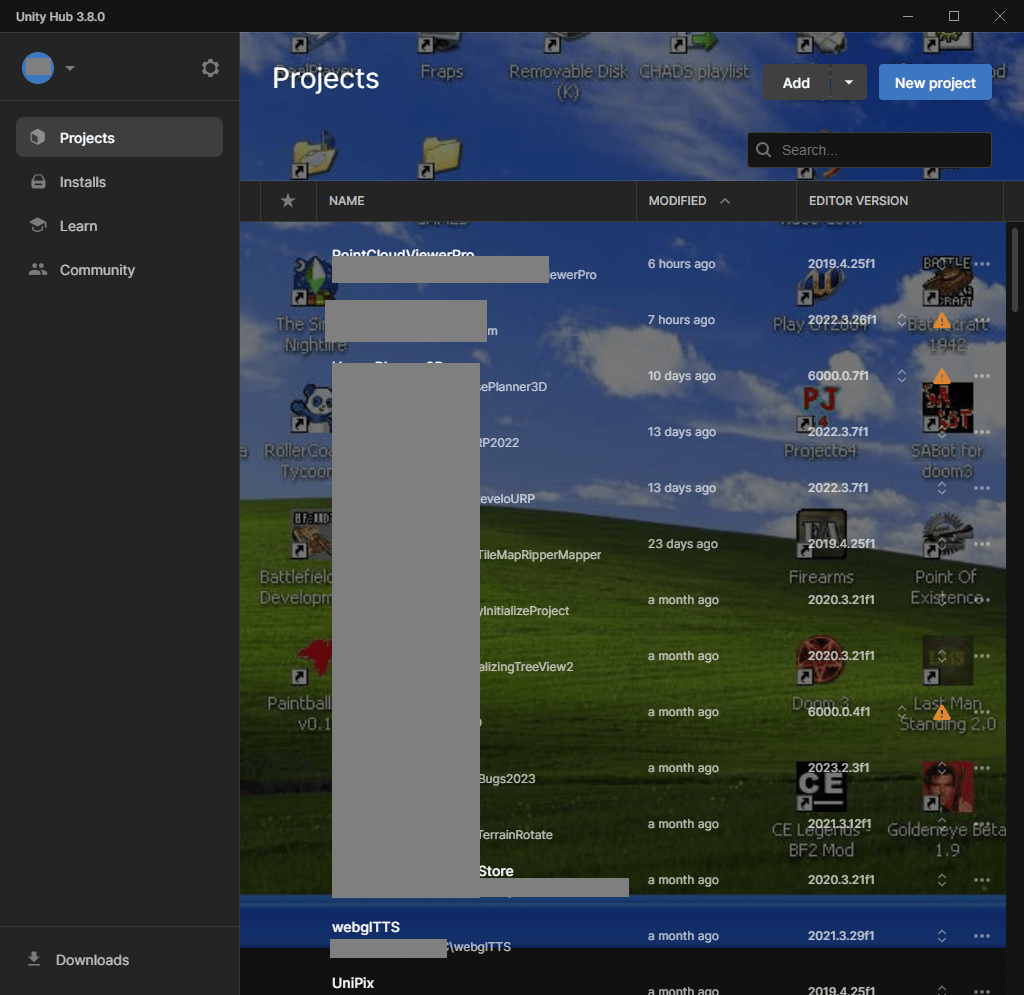
UnityHub: Make Hub application background Translucent
You can modify UnityHub to enable Translucent Background!
*Note Win10, you need to have transparent color enabled in settings: https://www.partitionwizard.com/partitionmagic/transparent-taskbar-win-10.html
Steps:
– Follow initial steps to unpack asar https://github.com/unitycoder/UnityHubModding
– edit app/build/renderer/index.html, add line: html, body, #app {background-color: rgba(0.7, 0.7, 0.7, 0.2) !important;}
– edit app/build/main/windowManager/baseWindow.js
// find line
const backgroundColor = this.getThemeBackgroundColor();
// replace with these 3 lines
let backgroundColor = this.getThemeBackgroundColor();
backgroundColor+= ’20’;
– Done!
Screenshot with windows desktop background showing through Hub:
Link to github:
https://github.com/unitycoder/UnityHubModding?tab=readme-ov-file#make-hub-background-translucent
↧